
Decorate With Deena | DIY: Changing Up Our IKEA Shoe Storage Cabinet
Hello, Loves! This week my husband and I tackled a small DIY project at home. We bought a shoe storage cabinet from IKEA that we thought would be perfect for our tiny entryway. Our shoes are always strewn about and the closet we have is already full of my shoes lol! I wanted to change a few things about it to elevate the way it looked since it was pretty plain. The process was actually super easy and we really enjoyed it! Keep on reading to see how we did it! You can also watch my YouTube video here or at the bottom of this page!

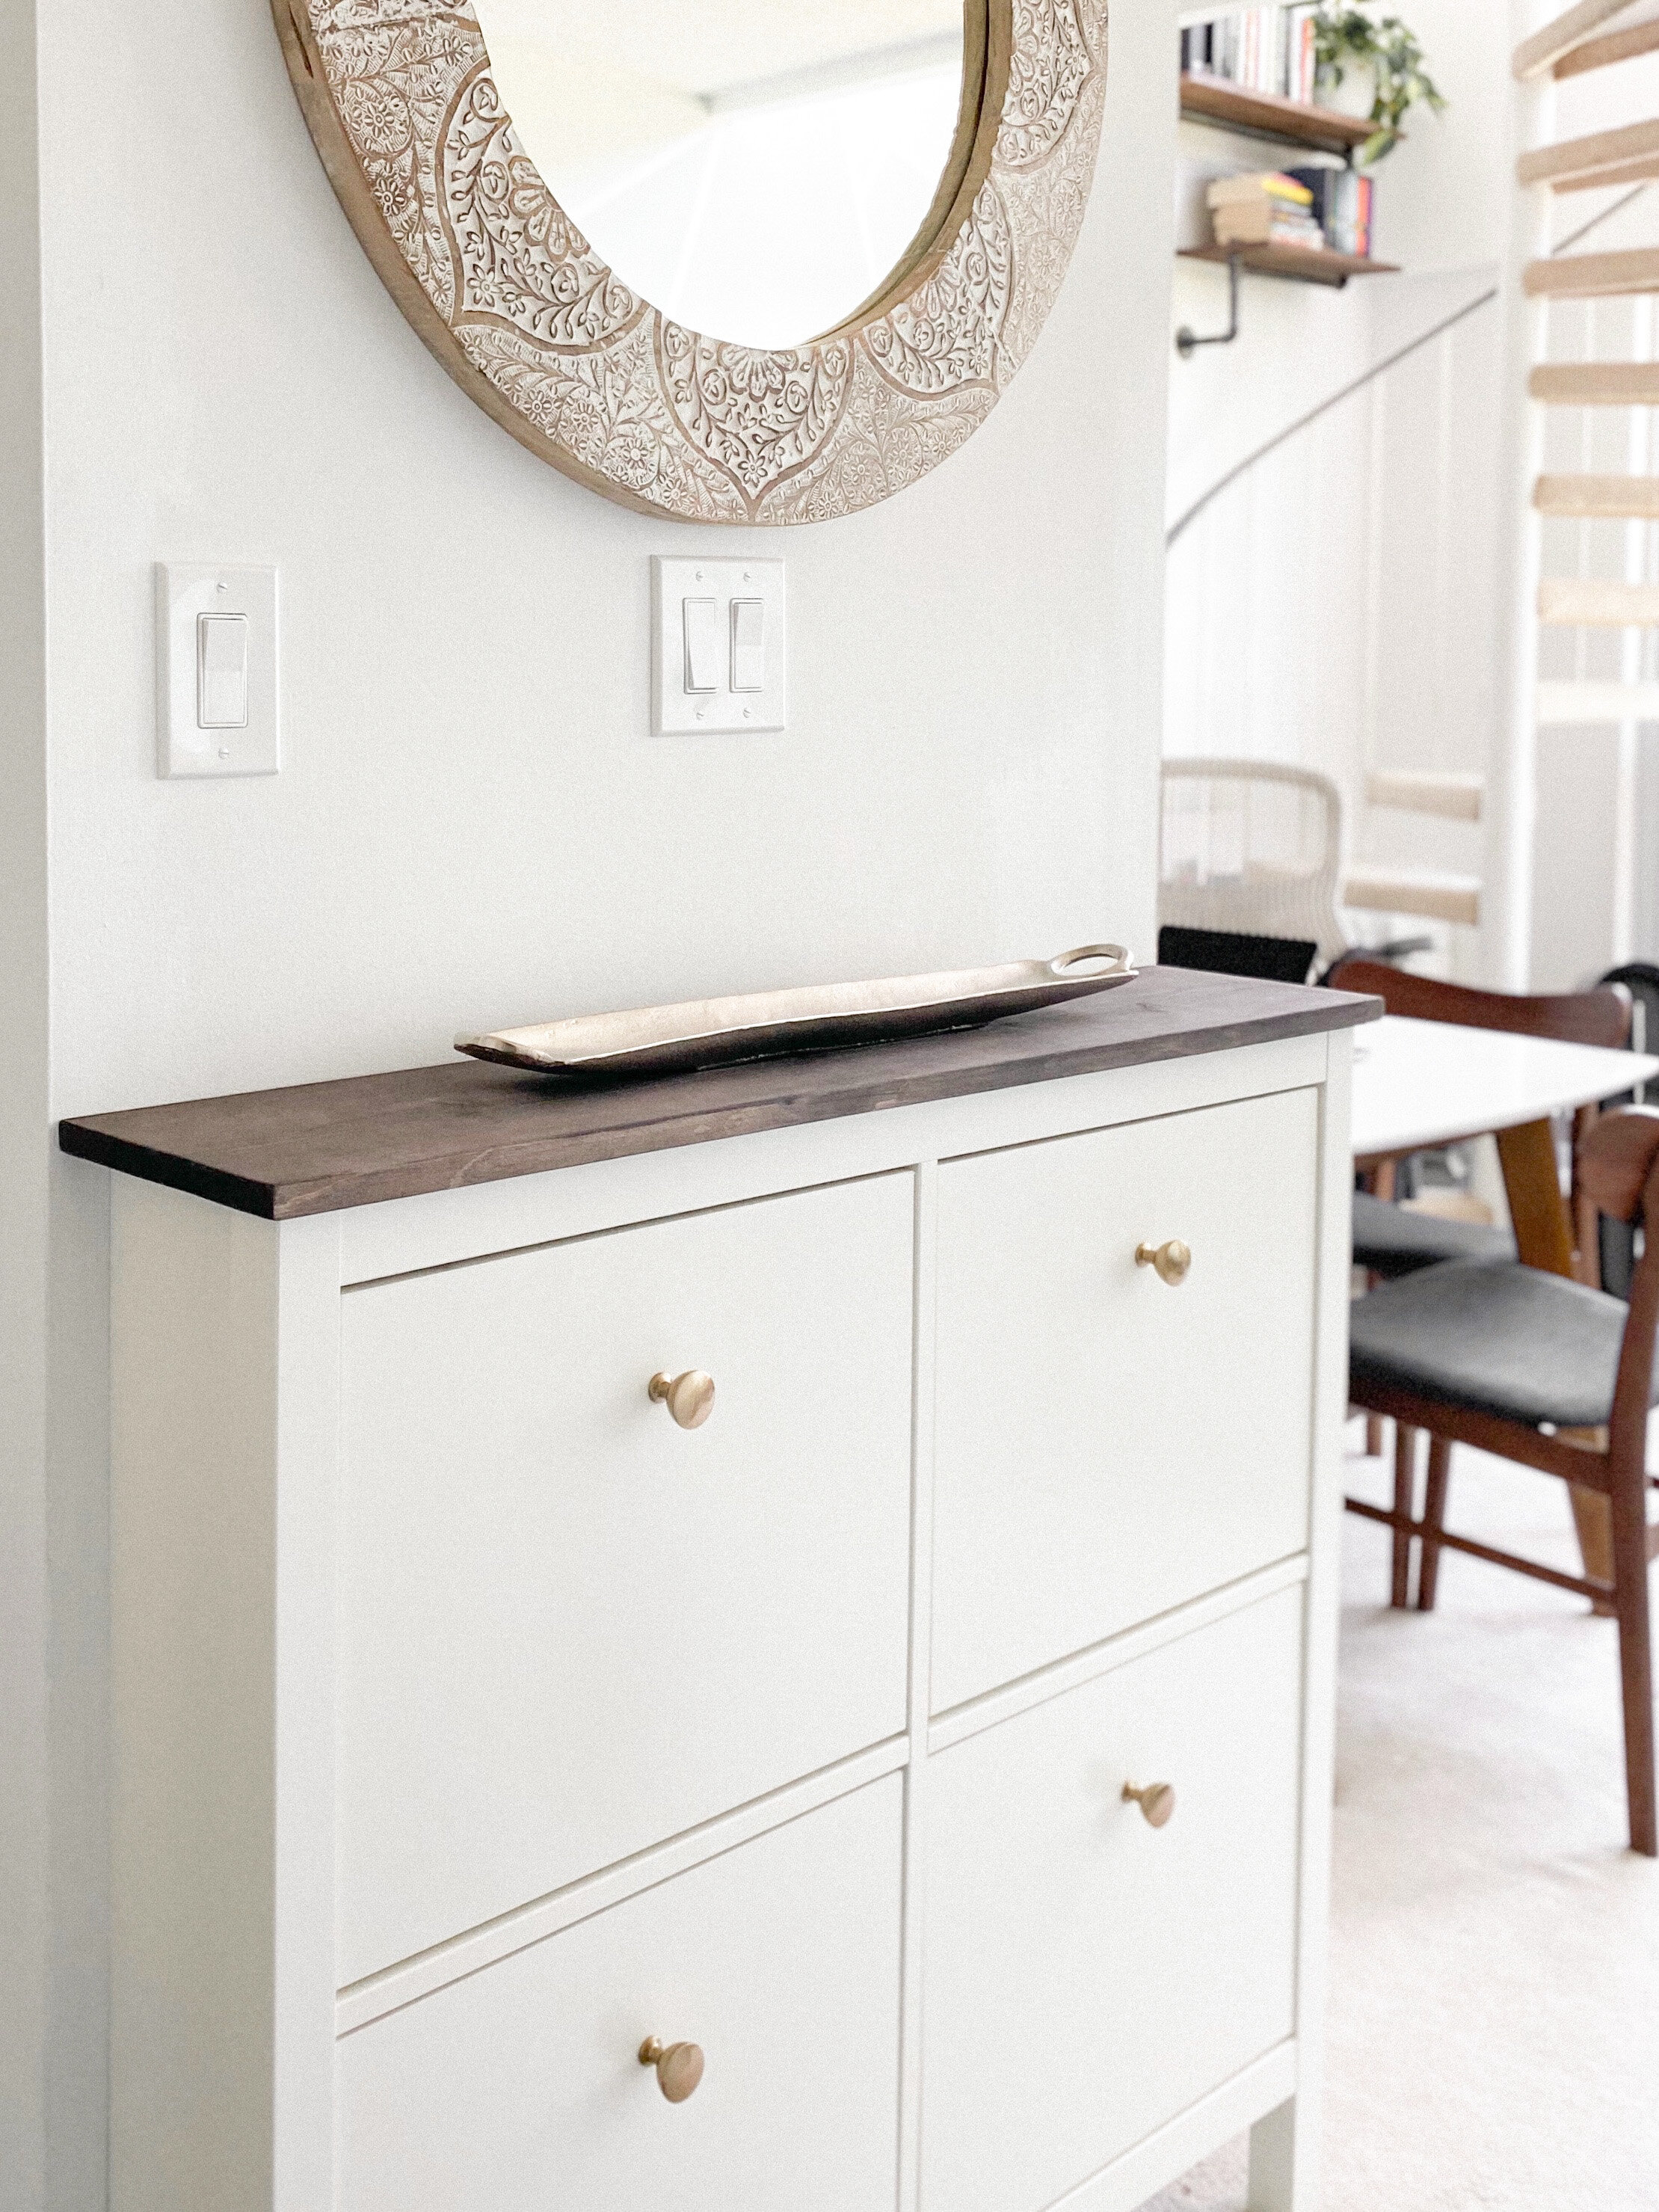
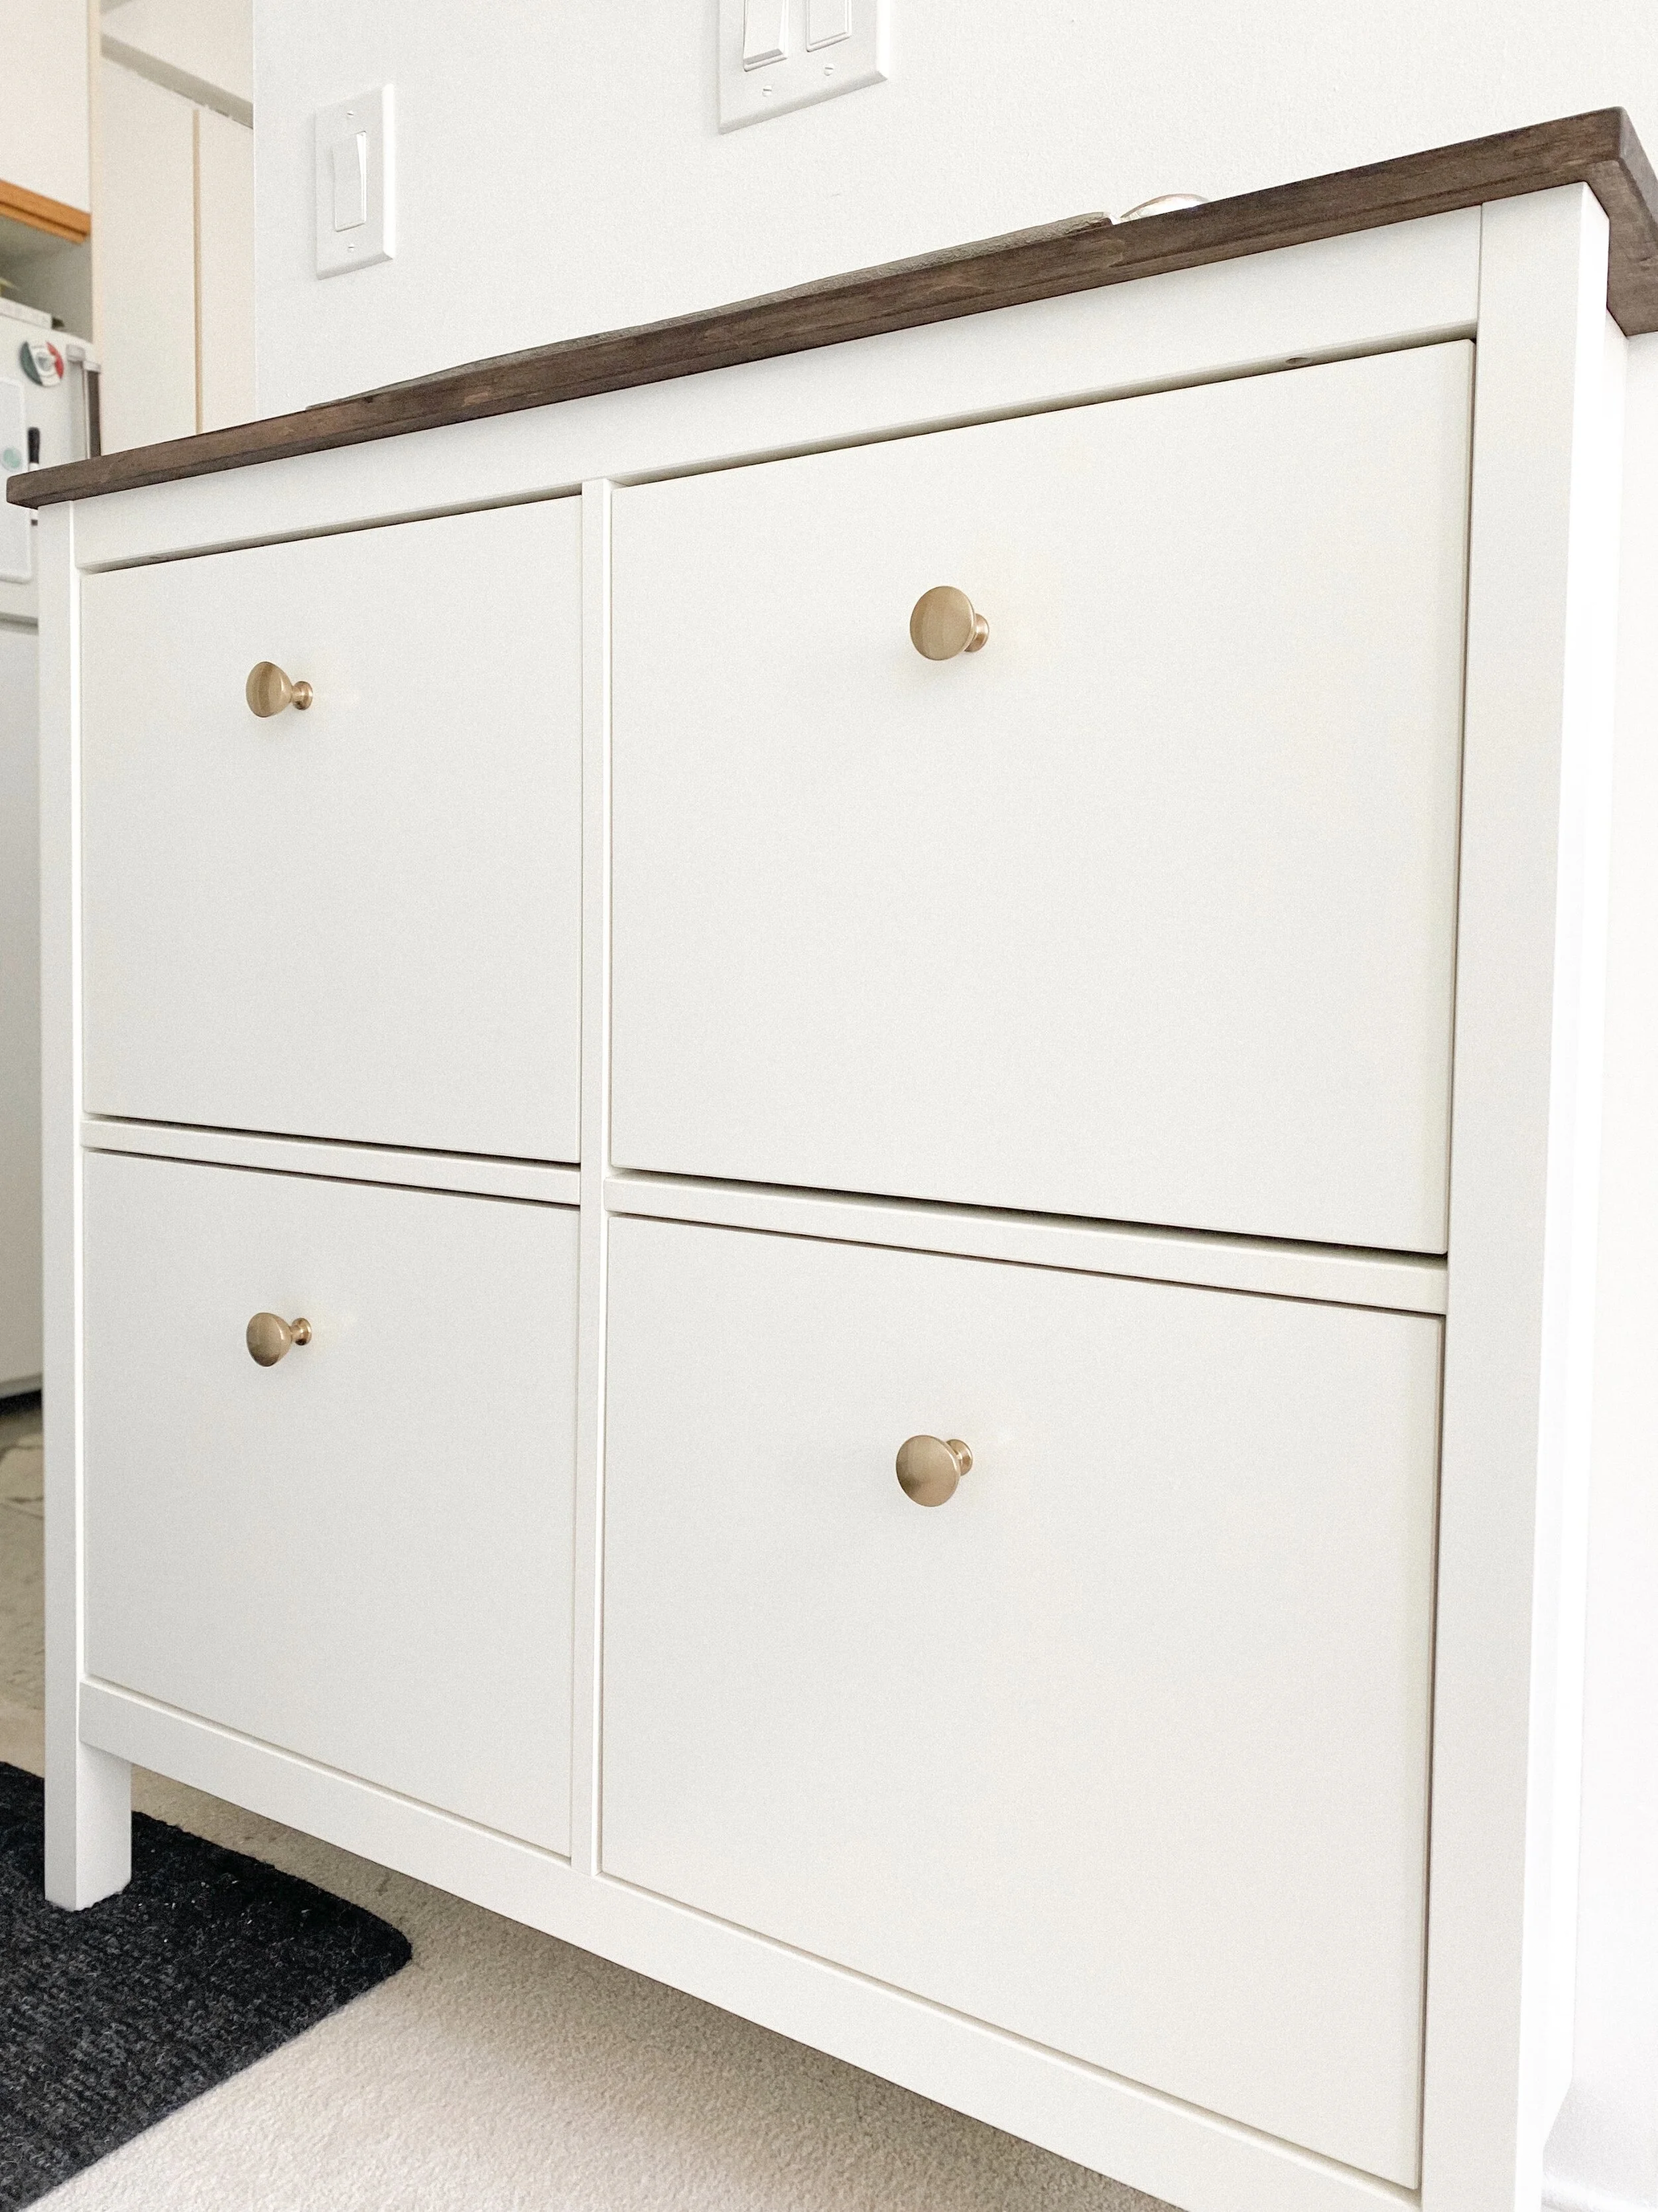
After we built the cabinet according to the provided instructions, we pulled off the top plank and the knobs for replacement. We then measured the plank and went to Home Depot to pick out a new one as well as new drawer knobs and a can of wood stain. Once we got those things, we headed home to put it all together.


We then drilled the same holes under the new plank as the ones under the original. Be sure to use a tape measure or a ruler and mark it before drilling!

The next step was to sand it down. We sanded down all the sides including the edges so they could be slightly rounded.

Once we finished sanding it, we put it back on the cabinet just to make sure it fit and that the sanding was to our liking. Then it was finally time to start staining! We laid down some plastic and some tape to ensure we didn’t get any paint on our carpet. It would be best if you have an outdoor space where you could do this. We put the stain on very lightly with a brush and then wiped it off with a paper towel until we finished the whole thing. Make sure to try it out on the bottom first in case you don’t like the color! We ended up waiting about a day for it to dry completely before we put it back on the cabinet.

After it finally dried, we screwed it into the cabinet to make sure it was secure. Then we put the knobs on to finish it off!

After we finished with the cabinet, we headed out to HomeSense (it’s basically HomeGoods, for my USA folks) to complete the look. I was hoping to find a few cute things to put on top but we thought it would be better to have it be functional so we bought a really beautiful tray for our keys to go in. Luckily we also found a beautiful antique looking mirror to go above it! All in all, I think this project was so worth it and came out even better than we anticipated. Keep scrolling to see the final look!


I really hope you all loved this blogpost! We had such a fun time doing this project. I hope that this has inspired you to take on your own DIY project. Leave me a comment below if you want me to share more like this and if you’ve done anything like it! I’d love to know. You can also watch us do this project in my YouTube video below!